Are you intrigued by the benefits of Revinax immersive tutorials, with their combined virtual/augmented reality and first-person video? Learn more about the step-by-step process that will create your first tutorial. Be sure to check out the practical advice from the Revinax team!
A proven process
Revinax has been developing and fine-tuning its immersive tutorial concept combining first-person perspective video with VR since 2014. Companies across continents and industrial sectors have worked with Revinax to design immersive teaching aids using its innovative solution to spread best practices. Through this extensive and unprecedented experience, the Revinax team has developed a highly effective production process:
- Low production costs. We use first-person 3D videos that are significantly less expensive to produce than the computer-generated images and animations of a 100% virtual reality solution.
- Fast design time. Your first immersive tutorials can be ready in as little as a few weeks.
- Unlimited tutorial accessibility. Our multimedia distribution platform can stream your videos to a wide variety of devices, anytime your users need them.
What does the Revinax immersive environment look like?
The virtual environment viewers experience consists of several fields (shown in the image below):
- A central area where the videos recorded from the expert’s viewpoint are displayed.
- A top banner showing all the tutorial chapters.
- Two side areas for displaying additional information in a variety of formats: 2D animation video, 3D object, text, slide show, catalogue, etc.
- An area outside on the back, generally used to display a logo and/or regulatory text.

Step 1: Launch meeting
It all starts with an initial meeting with one of our project managers to define some key elements.
- Purpose of the tutorial, first and foremost.
- Content to be captured and the key takeaways.
- How the tutorial will be published and what it will include: chapter divisions, audio commentary, additional data to be integrated.
- Logistics: filming locations, experts who will perform the procedures (and be filmed from their first-person point of view), schedule, etc.
- Delivery conditions: equipment (VR masks), training, etc.

Grégory ROS, CFO – Responsable Département Entreprise
« Functional specifications will be signed after some rounds of back-and-forth between the Revinax and client teams. By describing things precisely in this phase we are better positioned to handle anything unexpected that may come up on filming day. Frequently that’s when new – and interesting – issues crop up! »
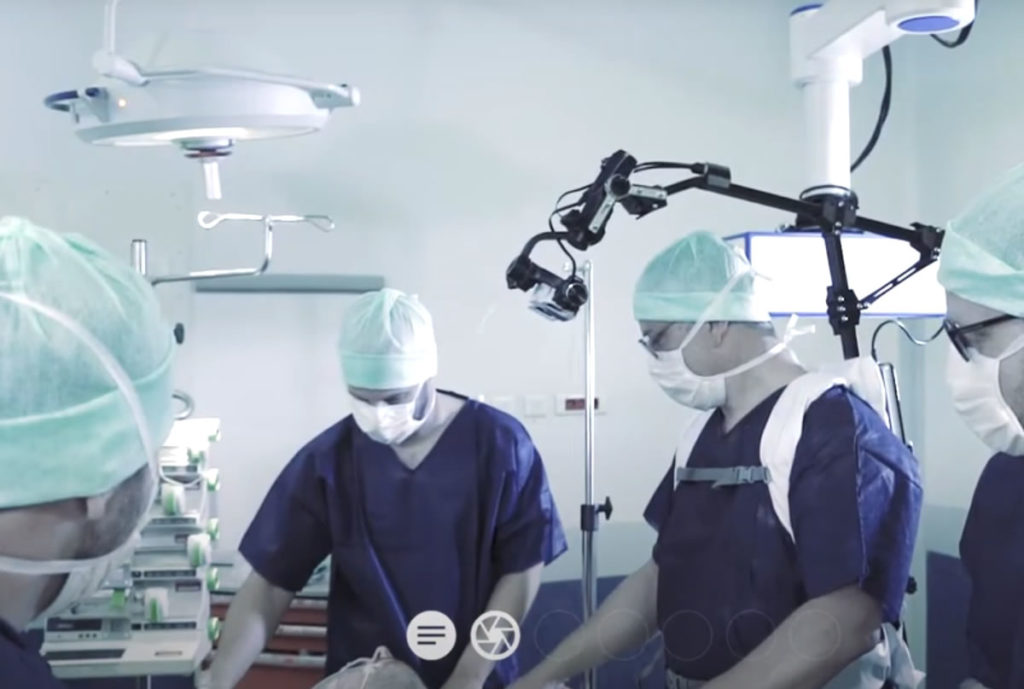
Step 2: On-site video capture
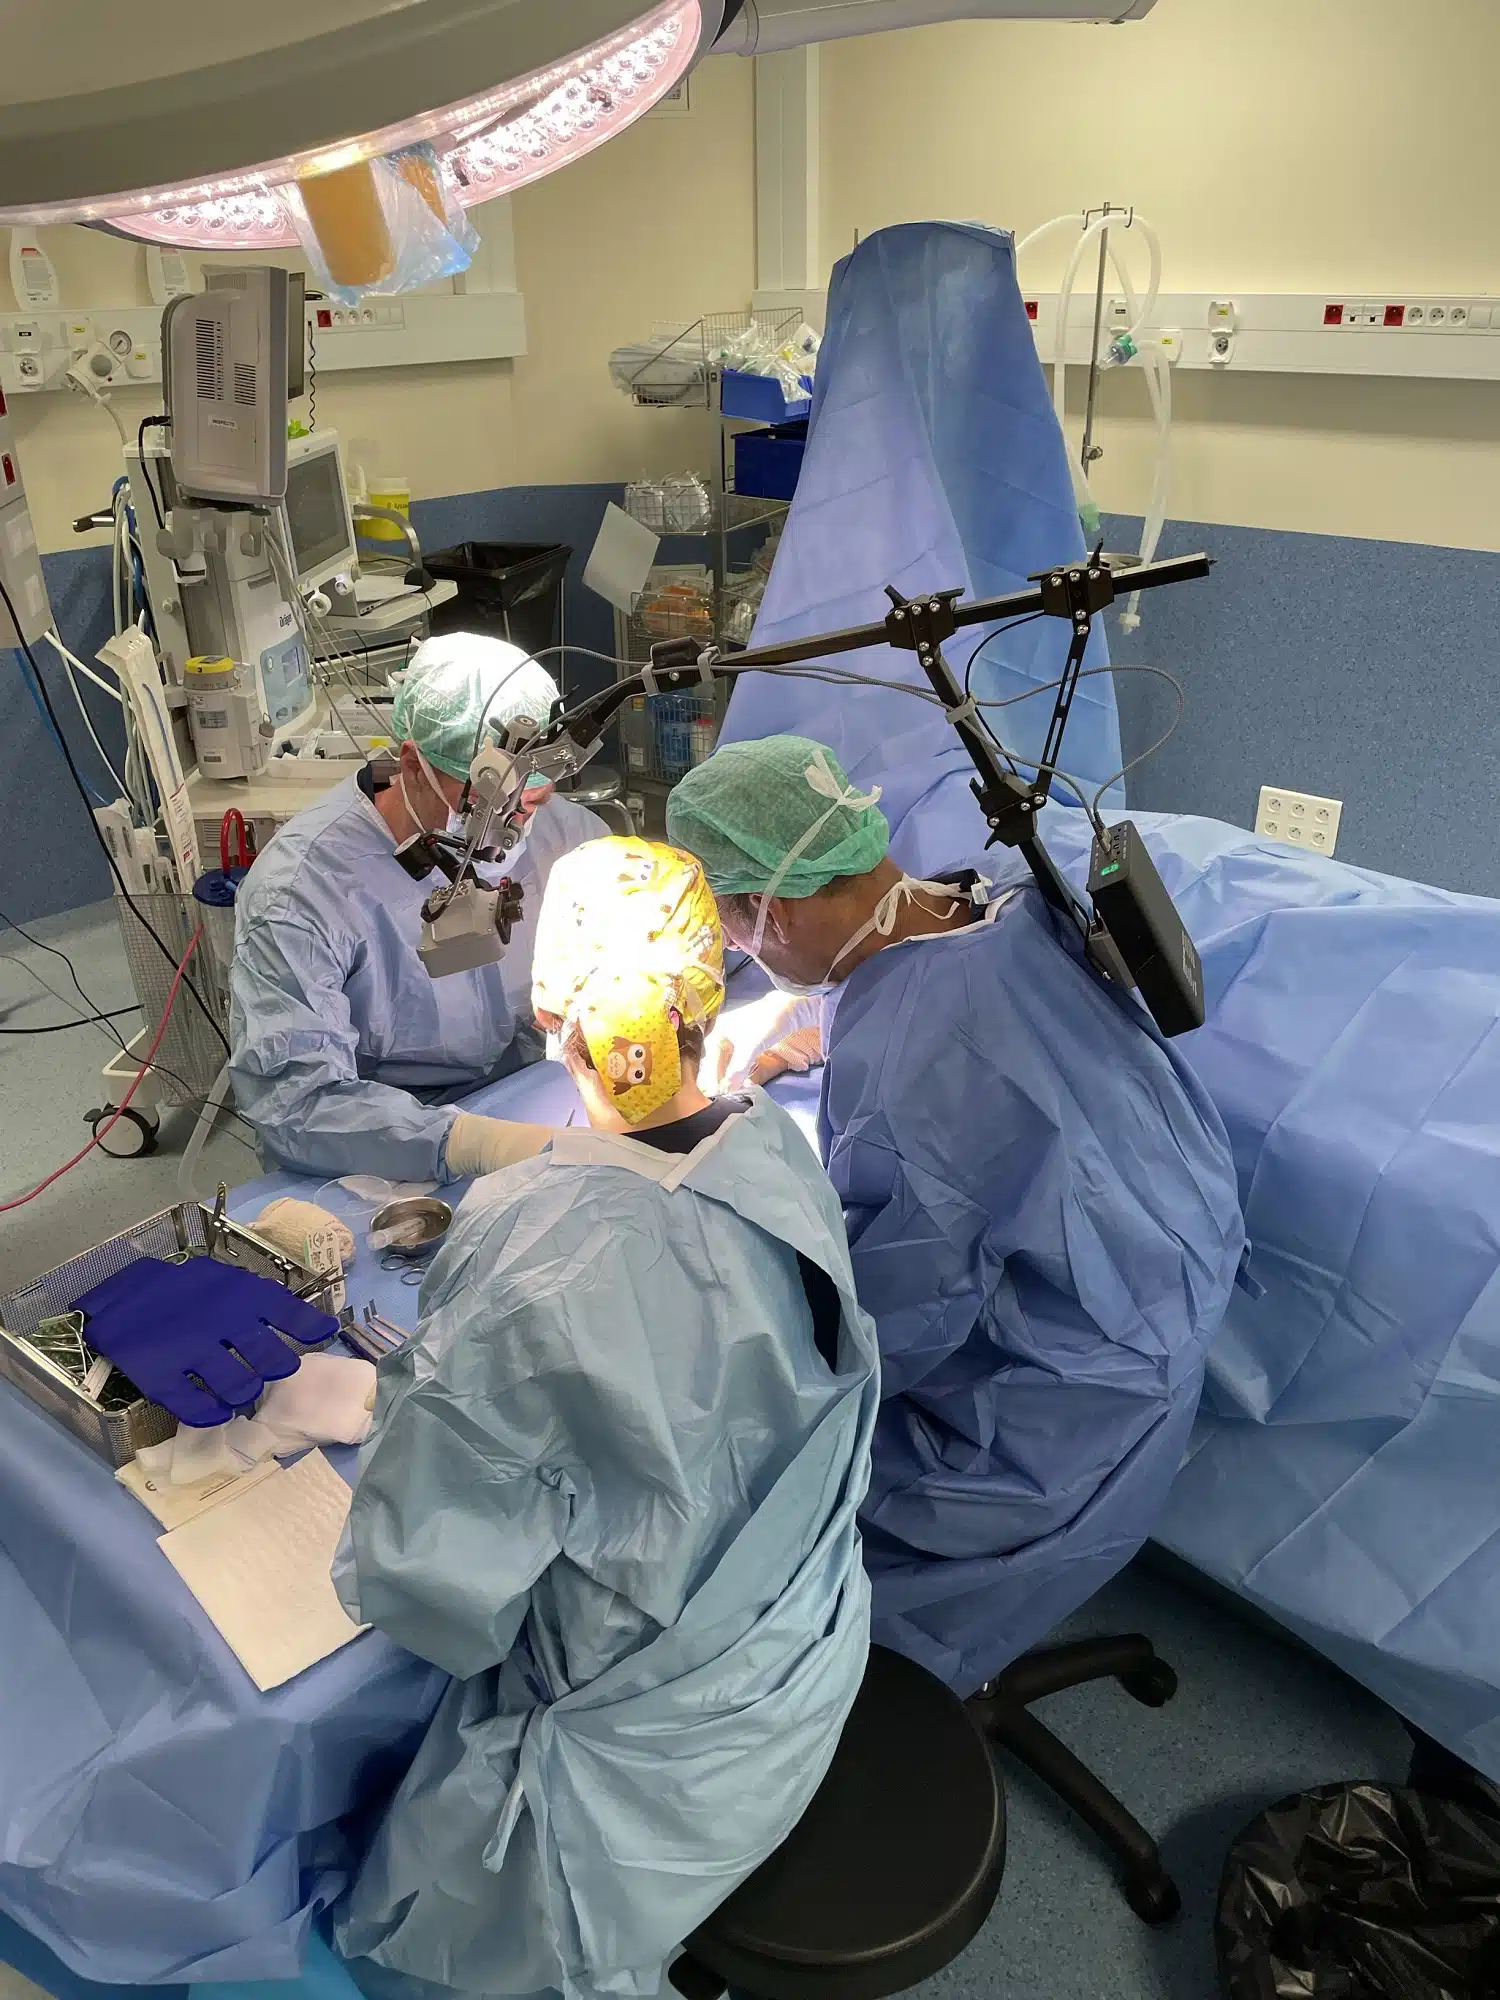
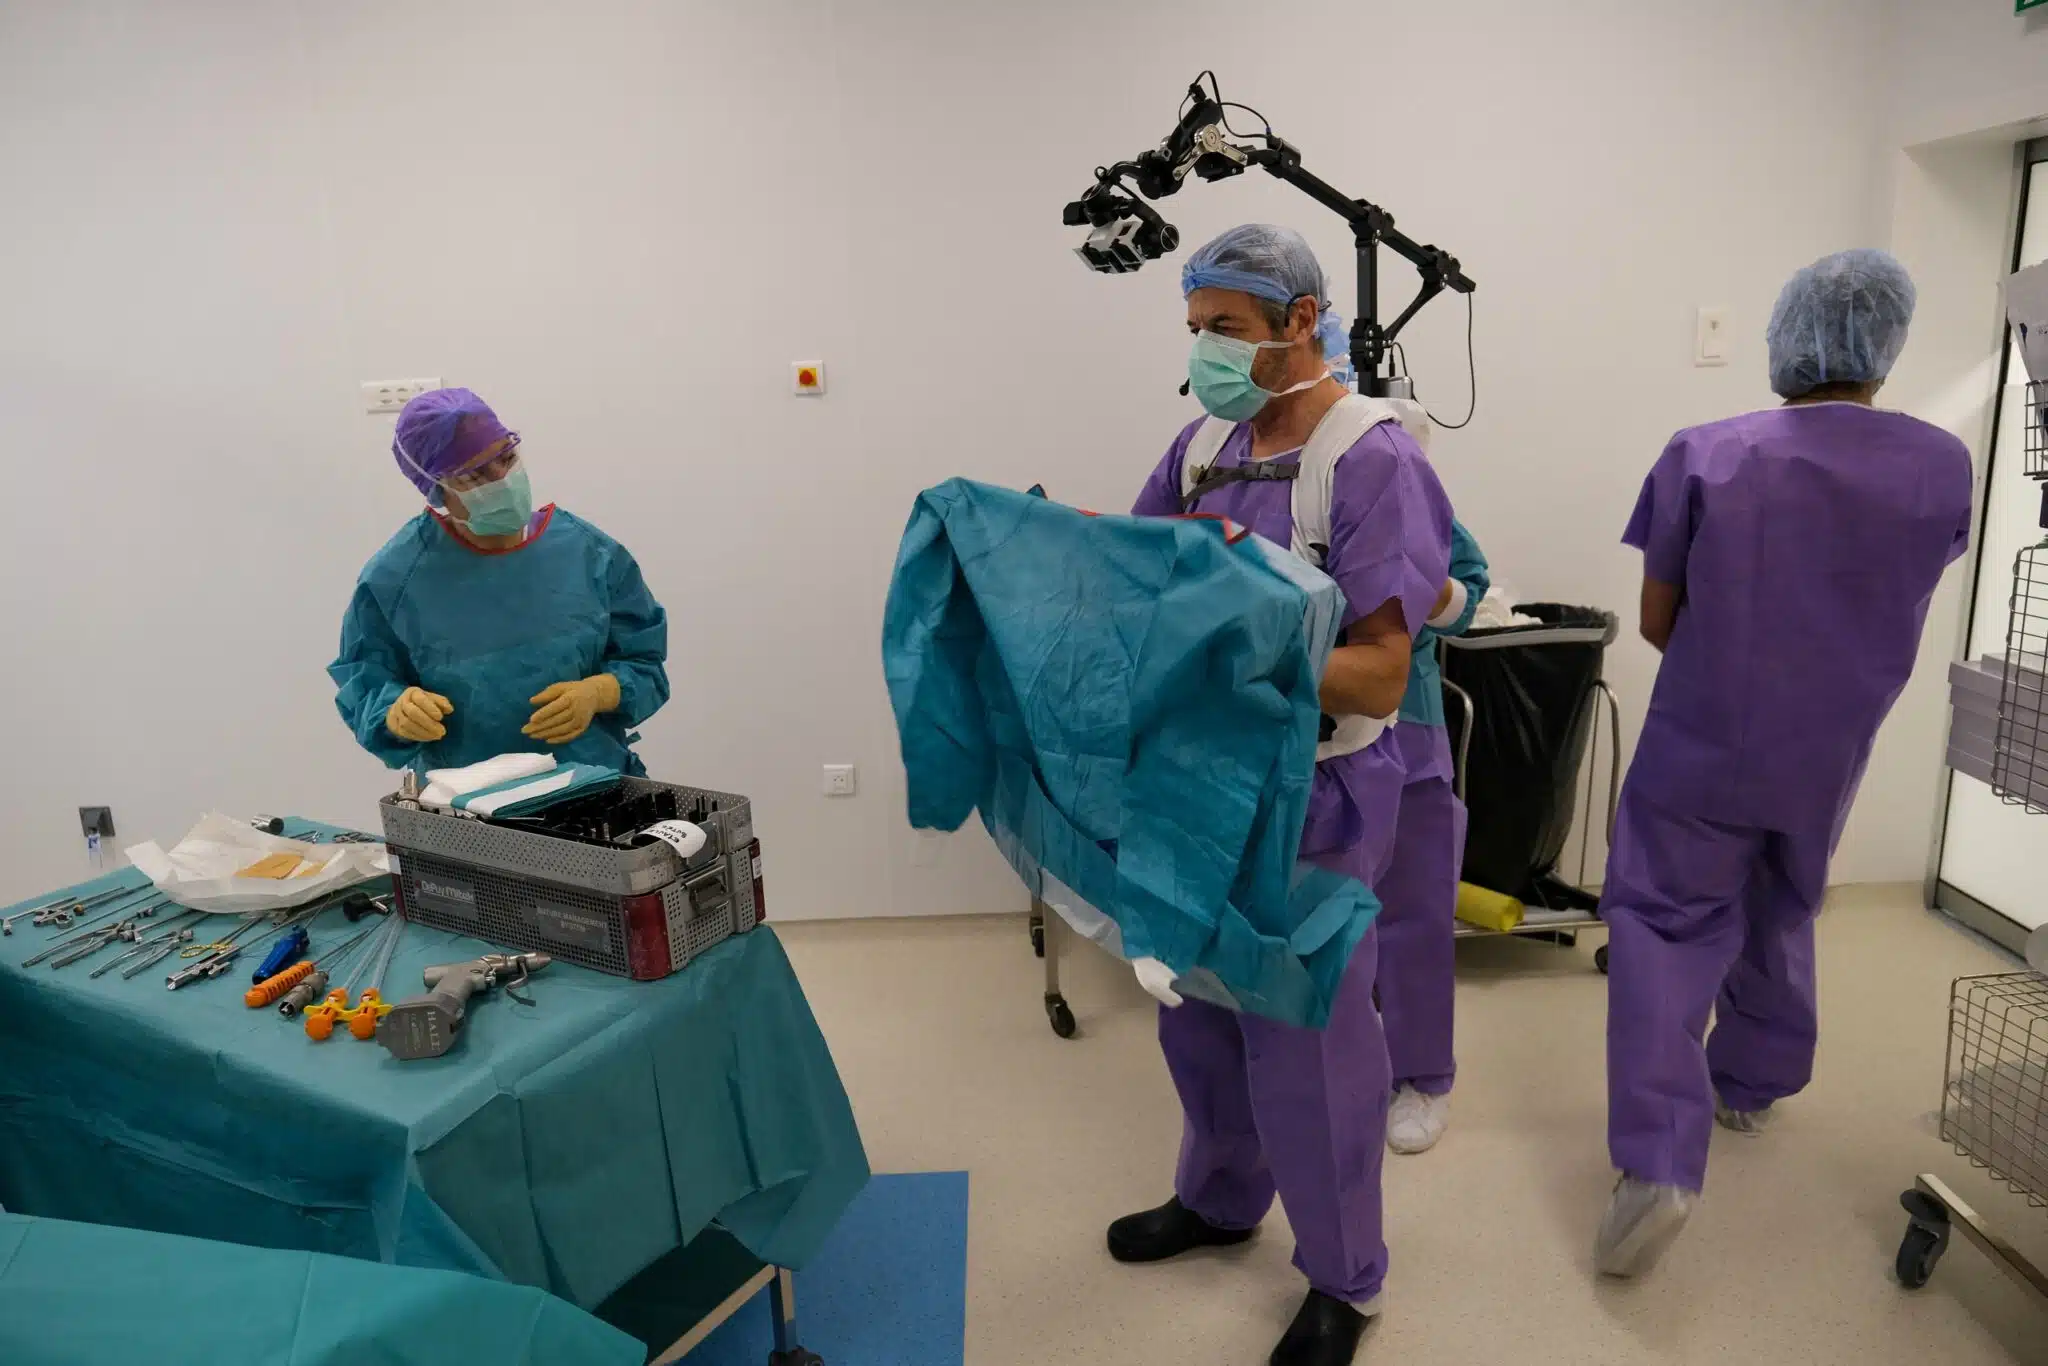
Filming starts on D-day, which is defined at the launch meeting..
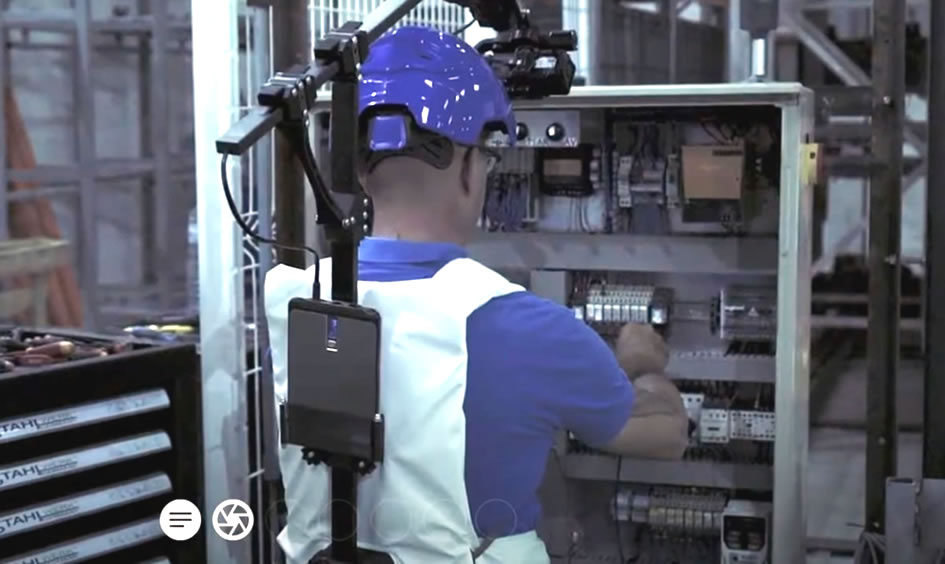
A Revinax project manager will be on site. First order of business: fitting the expert with a “rig,” the equipment developed by Revinax to capture first-person video in 3D. Equipped with synchronized and stabilized stereoscopic cameras, this patented system frees up the expert’s hands to perform the technical gestures.
The project manager then checks all the shots.
Each recording usually takes half a day to capture. Whenever possible, we recommend making two complete recordings per tutorial, in order to maximize the usable video resources during editing and production.
Depending on the case, an additional audiovisual technician may be needed to capture and synchronize any additional visual resources (the content displayed in the side areas of the mask’s visual field).

Sandrine DEVORS, Cheffe de projet
« My mission on filming day: making sure everything runs smoothly and efficiently. This starts with fitting the expert with our recording equipment and giving them a chance to get comfortable with it, if they need to. Then we coordinate all the tasks for the audiovisual production team. The goal is to obtain the highest possible quality raw materials for use in creating the tutorials. »
Step 3: Production
First we “de-Rush[MI1] ” all the video recordings made for the tutorial and select the sequences that are usable in the final video (reviewing exposure quality, removing “dead time”, etc.). This process takes roughly three times as long as the rushes for each shot.
All the elements that can be used for the VR part of the tutorial are selected at this time (analyzing “spectator” movement, fades, etc.)
At the end of this phase, all of the tutorial chapters are edited per the breakdown of the steps defined during the launch meeting.
We recommend an “experience” that lasts a total of 7 minutes on average.

Maxime ROS, CEO
The average Revinax tutorial lasts about 7 minutes, in line with the recommendations for tolerance (if this is someone’s first use) and impact. This type of immersive experience can last up to 20 minutes for particularly complex operations. We sometimes recommend splitting the experience into several parts, so that users are not in the VR environment for too long at once. Our goal is to optimize the experience!
For an initial tutorial and relatively simple gesture or process, the length can be reduced to 5 minutes.
Step 4: Checkpoint
The 2D version of the video is sent to the client to make sure it matches what was defined earlier.
Step 5: Immersive experience development
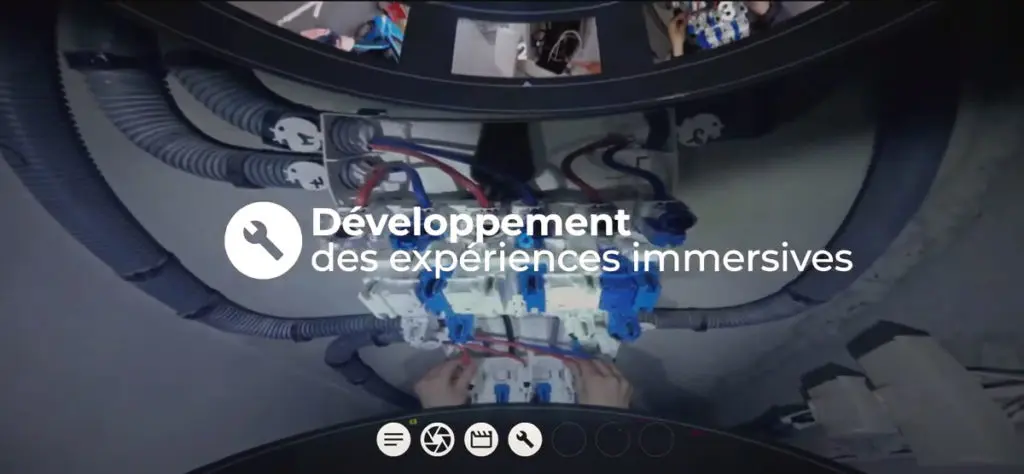
Now it’s the Revinax development team’s turn. They design a custom environment and immersive experiences that meet the client’s specifications.
As noted earlier, the first-person footage is displayed in the central area of the VR interface. In some cases, additional video may be integrated (taken from a different angle, or for “four-hand” procedures, from the opposite point of view).

Stéphane SAFFRE, CTO
« The development team performs the online integration of all the tutorial elements and makes sure the quality is excellent. We check the visual comfort of the VR videos and make sure the experience functions properly on the different platforms. »
Step 6: Integration of audio and additional data
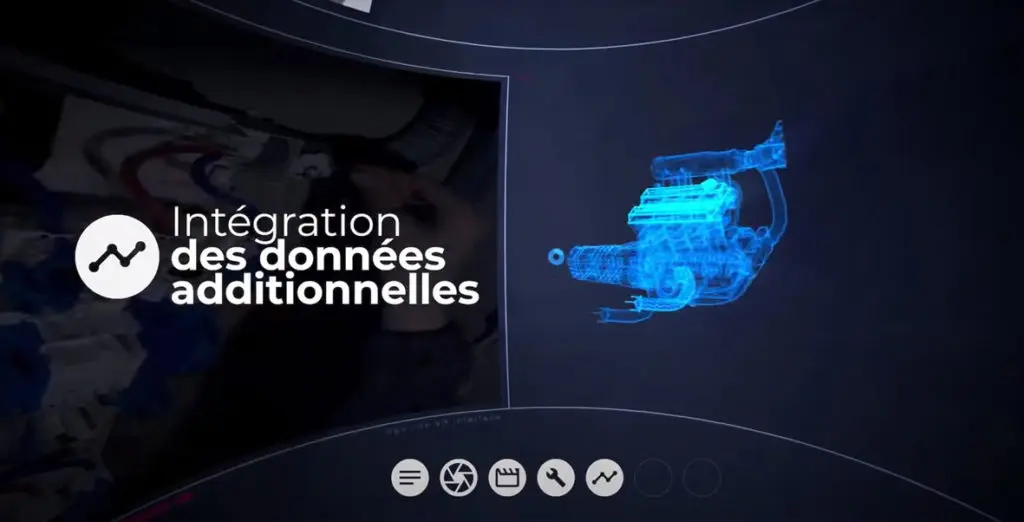
All additional information is now integrated into the tutorial, for viewing on either side of the main display area. These additional data, provided by the company and/or the expert, can be in a variety of formats: text, 3D document, 2D animation, slide show, etc. They are converted and adapted for optimal fit in the tutorial interface.
If needed, the Revinax team can also develop additional documents or information and integrate these into the tutorial.
This is also the point where the audio commentary is edited, synchronized, and integrated.
Sandrine DEVORS, Cheffe de projet
« The audio commentary may consist of a voice-over along with recordings made during the video capture. It depends on what was defined in the specifications. We can translate the text and include other languages to match the regions where the tutorials will be used. »
Step 7: Tutorial validation
Revinax presents the complete tutorial in a video-conference to check and validate the interface and content in the 2D version.
Step 8: Tutorial deployment/distribution
Once validated, the tutorial is deployed on our dedicated hosting and distribution platform. Your users can now access it through a variety of media:
- Using a VR mask, for workshops;
- From a smartphone in VR mode or in 2D mode via Revinax’s Handbook mobile app.
The platform’s interface allows you to restrict access to your tutorials — or not. That’s up to you.
Your tutorials are not only available anywhere, anytime: with this distribution method you can update your content without any propagation delay. It also includes all associated updates of the various multimedia devices (Oculus Go/Pico/iOS/Android adaptive maintenance).
Laurent ATCHE, Marketing & Sales development
« In this phase we help field actors learn to use and master the device. »
“DIY” option
Revinax offers a “Do It Yourself” solution as well, so you can:
- Capture the video yourself with your own experts… using Revinax’s patented stereoscopic shooting equipment.
- Design your own immersive experiences and organize the files using editing software.
- Import your own teaching narratives into the immersive environment developed by Revinax.
- Distribute your tutorials automatically through our multimedia platform.
Grégory ROS, CFO – Responsable Département Entreprise
« We can also develop a tailored workflow; for example one where the client does the capture and we do the editing, so that then all they have to do is integrate their additional data. ».
A video summary of the Revinax process (in only 1’20”):
[MI1]Does this mean you extract the video from Adobe Rush software? I don’t think everyone would understand this term without an explanation, so if that’s what this means let’s write “First we extract all the video recordings made for the tutorial from the Adobe Rush software, selecting the sequences…”